Showing posts with label String Quilts. Show all posts

Friday, April 11, 2014

Scrappy String Bars

It all began with some leftover strings and a couple of grab bags from Homestead Hearth last year. I cut a lot of the fabrics into Tumbler shapes but always had some leftovers so my string stash began to  grow.
 I remembered my book Liberated String Quilts by Gwen Marston and found a quilt I wanted to make.
Gwen does not use a foundation for the string quilts so I just began sewing strips together.
 First in pairs of two, and I decided on an approximate length of 7+" so I could cut them down to 6 1/2" for my strips.
 The strings seemed to grow.
 Many were too short so I put them in this cute Moda tin to be another quilt later.
Here are larger sets. I just chose fabrics that I liked together - pretty random, though!
 I put them on the design wall to get the lengths similar as I continued to add sections together.
Next I auditioned some borders and chose red in the end with a narrow green border.
 I went ahead and sewed both borders together, knowing it would give an 'old-fashioned look' to the quilt because they both extend to the sides together.
 A close-up of the fabrics and quilting.
Here is the finished quilt! It will be a wallhanging and is quilted with random clams, similar to the Baptist Fan.
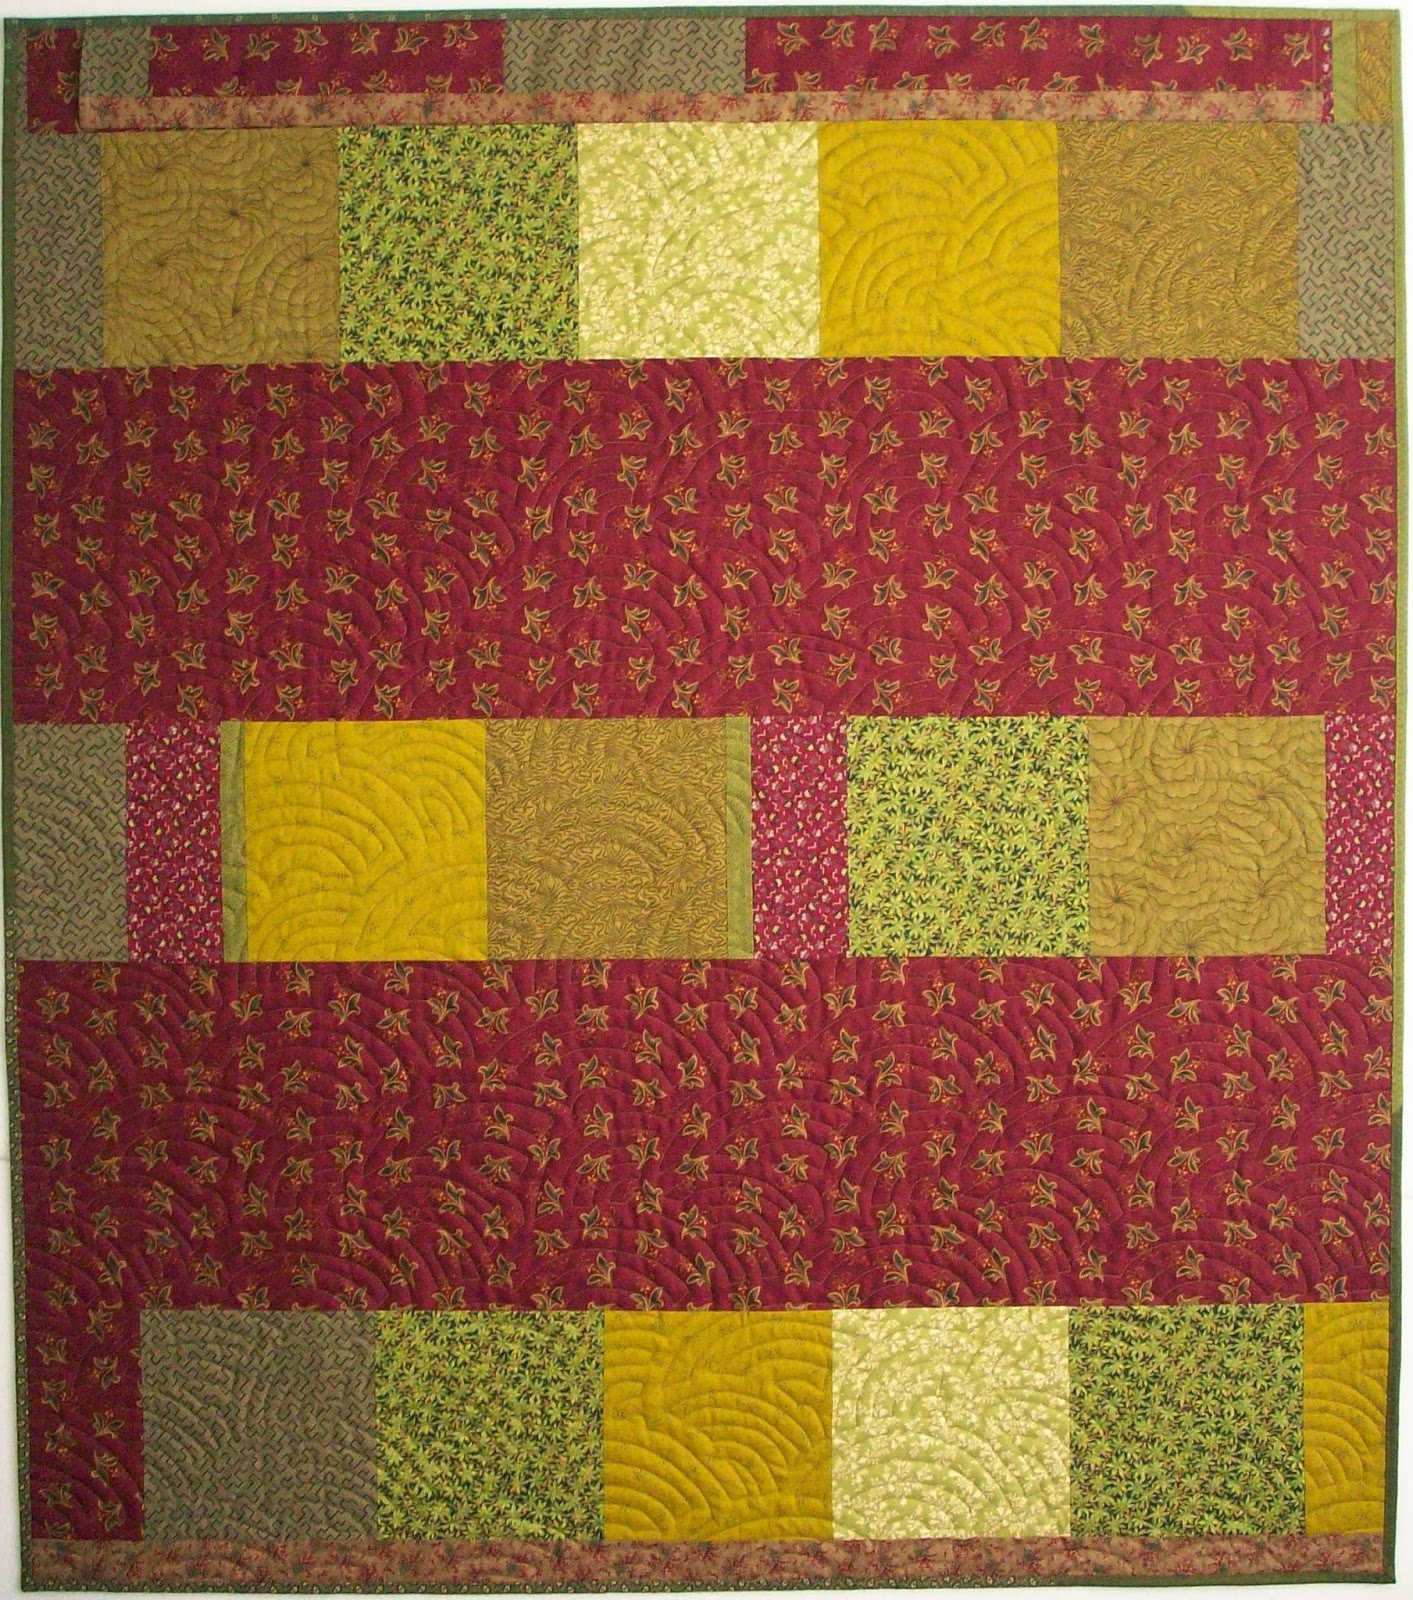
 I pieced the backing, as I frequently do, and even pieced the sleeve at the top.
Another close-up. I still have plenty of strings to make another quilt but I guess this made my stash shrink a little bit! Happy Stitching!

Friday, April 6, 2012

Floating Borders Tutorial

 This is a little tutorial on how to make "floating borders" on a quilt. Each border is the same length and the corners are not mitered. Above shows how the final border will look on each corner. You do this by starting with a partial seam on your first border, see below.
Temporarily lay the last border on the fabric or measure it's width to know how far to extend the first border past the white inner border.
 The border is pinned in place but several inches are left unsewn at the beginning, thus your partial seam. This applies only to the first border. After it is sewn, you have a finished end.
Above see the other end of the first border, sewn all the way to the end of the white inner border.
Add your second border and sew from beginning to end, as above.
I did not measure these exactly to size since they were pieced, it was hard to get an accurate measure. I left a little on the ends and then squared it up each time a border was sewn.
This picture is of the fourth border and first, ready to be joined. You can see where I had the partial first border seam still open.
Now it is pinned in place to complete the seam of the first border.
And here it is - totally sewn.
Here is the completed top with a not so good picture of the borders. Zoom in and you can see better. I was just too anxious to get these pics up I guess.
And two empty containers, meaning I had used up all my strips and fabric from two shoe boxes. 
And here is the pieced backing. I had several leftover blocks that were too small to fit on the front, therefore they became backart. I was trying to use all of Granny's strings and the yellow fabric, which was also in the container. I did add a few of my own to even it all out.
Now all that is left is quilting!! 

Thursday, March 29, 2012

Granny's Strings Making Progress

I have finally taken some time again to work on Granny's String Quilt. I say that because when you quilt for others, it is often difficult to take the time to make your own quilts. In fact, I have had to quit doing custom work, so I can free up some of my time. But today I said,  "It is okay, you have quilts to make, so go sew!!" And I did. I added a 2" white border to separate the inside strings from the outer border.
I've been sewing the leftover strings all morning, making sure they were at least 4 3/4" long. I pieced some to make better use of the scraps. I kept sewing them together until the pieces above got much larger then I trimmed the strips down to 4 1/4" wide.
Here's how it will look once I get the border sewn on. Maybe tomorrow, but this afternoon it's back to longarm quilting! I love seeing quilt tops become quilts whether they are mine or other peoples!! Happy Stitching!!

Monday, February 6, 2012

Granny's Strings

 This is a quilt top that my mother-in-law made about 12 years ago. Her health was failing but she loved to sew and quilt and always learn new techniques. I showed her how to string piece these blocks and she was using her favorite colorway - pastels. She loved pinks and blues, but also red, so you can see lots of little red strings thrown in for a splash of color.
I am going to finish this quilt top and make a quilt with probably 48 blocks.
This was her only UFO when she died as far as quilts were concerned. She loved to piece the tops and then I would quilt them for her on my trusty Bernina sewing machine. No longarm back then! Above are the strings and pieces of fabric she had in the little plastic shoe box with the quilt top.
 Last night I began pressing all the strings and sorting them by size and separating the whites which always go down the center.
 I began piecing some more blocks, working on four at a time. The paper I am using comes on a roll and is 8.25" wide. I've had it a long time and it was sold to be used behind machine embroidery. It tears away very nicely.
 I just keep adding various colors, being sure I cover the paper plus a generous seam allowance on the outside of the paper.
Here you can see I've left plenty of fabric because my seam allowance is outside of the paper.
 Here is a block that has been trimmed on the left, with 1/4" seam allowance.
And here is the finished block. I like to leave the paper intact until after I sew the blocks together, mostly because the seam are on the bias and the paper keeps it from stretching out of shape. I think I am going to have to take her blocks apart, press them well and put them back together. Because of her failing health, they will not lay flat and I want to put the quilt together as she would have wanted it. She was an expert seamstress in her younger days and loved to quilt and have things very neatly done.
This Feb 8 will be ten years since she passed away. I am going to show some of her other projects in a couple of days to honor her love of sewing, quilting and embroidery and sharing her gift with many others.

Saturday, February 4, 2012

Diagonal Madness & More

 Diagonal Madness was begun over two years ago in a class with Kaffe Fassett. I eventually got the diagonals completed but it was set aside waiting for those 50+ nine patches in the border. So, this past week I finished the borders, sewed them on and quilted it!! Wahoo!
 Here are two close-ups of the quilting. I used a variegated thread since there were so many colors in the top and a pattern called banana swirls.
 Above is the back of the quilt. And now the binding is sewn and ready to be attached. It's nice to get another quilt of my own finished!
 Here is a quilt top that my mother-in-law began over ten years ago. I had taught her how to string piece on lightweight paper and even though her sewing skills had diminished with illness, she still loved to try new techniques. After she died I took the little plastic shoe box with the blocks she had finished and sewn together. I am going to finish this quilt for her with just a few more blocks being added.

There is a new blog I am a part of called String Thing Along. I will be posting more pictures of the progress of this quilt there. It's such a fun way to quilt with all those strings and scraps we have! Come join the fun and be a part of this blog!
 Here is my UFO project container. By UFO, it is really mostly leftover fabrics from other projects and it is now running over. The lid will hardly close which shows how long since I've played with my leftovers.
 This is inside the box!! I used to enjoy taking the leftover fabrics, add a few more and make charity quilts or smaller quilts with no rules. I hope to attack this box soon. There are so many fun projects that could be made if I will allow myself to play.
 And here is a recent tablecloth, yet unquilted. I went to a retreat in January and sewed this. I already had the strips cut so it was easy to sew and get the blocks made with a group of 50 quilters in the room. Now it is waiting to be quilted. I chose the fabric combination from a quilt I had on display in the fall. So, it'll be a few months before I'll need this one.
 And now for my house blocks!! Two are 3", one is 4", and two are 6". The six inch were much easier to make I must confess. It is fun picking the fabrics from the scrap pile. Hopefully there will be more or enough to make a small quilt before the year is out.
And now, another small project I had been putting off. I needed a little pillow behind my back at the computer. After months of just the pillow form with no cover, I got around to making a colorful pillow case. Now how hard was that?? A 30 minute project that I had delayed for months. Happy Quilting!!